Hello, I’m Linda Miller, your go-to hairstyle expert. Today, we’re diving into the world of hair highlights, starting with a question many of you have pondered: How often should you get your hair highlighted?
Table of Contents
How Often to Get Hair Highlighted
First, it’s helpful to understand the lifespan of a highlight. As your hair grows out from the root, typically about 1/2 inch per month, the highlighted pieces gradually fade and blend into your base color. The regrowth becomes more visible over time.
Generally, plan for a touch up every 8-12 weeks. This allows enough new growth for the highlights to be noticeably refreshed, without significant maintenance challenges. However, your individual rate of hair growth is the primary determinant.
Consider Your Highlight Style
Full highlights that cover your whole head can often wait a bit longer between appointments than subtle face-framing highlights. If only small sections are highlighted, the regrowth along your part or hairline is more noticeable.
The look you prefer also matters. Some like the natural grow-out, while others want the highlights looking freshly done. Talk to your stylist about the style you want to maintain.
Don’t Compromise Hair Health
Damaged or fragile hair may need more time between chemical services. Work with your stylist to determine a schedule that renews your highlights while also giving your hair a chance to recover.
Find Your Customized Routine
While 8-12 weeks is a good general rule, your ideal timing depends on your hair itself. Have an open conversation with a trusted stylist. Together, you can create a personalized plan that keeps your highlights looking their best.
How Long Does It Take to Highlight Hair?
Now that you’re equipped with knowledge on how often to get your hair highlighted, let’s delve into another crucial aspect: timing. Understanding how long the highlighting process takes can help you plan your salon visits or DIY sessions more effectively. So, let’s break down the timeline for getting those gorgeous highlights.
The Highlighting Timeline: What to Expect
Highlighting hair is not a one-size-fits-all process; the duration can vary widely depending on several factors. Here’s what influences the time you’ll spend getting those stunning streaks:
1. Preparation Time
Before any color touches your hair, your stylist will need to assess your hair’s condition, discuss your desired outcome, and prepare the necessary tools and colors. This prep work can take anywhere from 15 to 30 minutes.
2. Application Technique
- Foils: Traditional foil highlights can take 1 to 2 hours to apply, depending on the amount of hair being highlighted and the complexity of the technique (e.g., full head vs. partial highlights).
- Balayage: This hand-painted technique can vary in application time but generally falls within the 45 minutes to 1.5-hour range.
- Cap Method: Used less frequently these days, cap highlighting can take around 45 minutes to an hour, not including processing time.
3. Processing Time
After the color is applied, it needs time to develop. This processing time can range from 30 to 45 minutes, depending on the desired shade and the starting color of your hair.
4. Rinsing and Finishing Touches
Once the color has processed, your hair will need to be rinsed, shampooed, and conditioned. Afterward, a toner might be applied to achieve the perfect shade. Including a blow-dry and styling, this final stage can take another 30 to 45 minutes.
Putting It All Together
In total, you’re looking at a range of 2 to 4 hours from start to finish for professional highlights. Remember, this is a rough estimate. The exact time can vary based on the technique used, the hair’s length and thickness, and the desired results.
Tips for a Smooth Highlighting Experience
- Book Accordingly: Knowing the time commitment required, schedule your appointment on a day when you’re not rushed.
- Consultation Matters: Have a chat with your stylist beforehand to align on the expected duration and desired outcome.
- Patience Pays Off: Quality highlighting takes time. Rushing the process can lead to disappointing results.
How to Use Foils to Highlight Hair
Moving on to the practical side of things, let’s dive into the world of foil highlights. Foil highlighting is a popular technique used to create beautiful, dimensional colors in your hair. Here’s a step-by-step guide to get you started.
Step 1: Gather Your Supplies
Before you begin, make sure you have the following items on hand:
- Hair highlighting kit or bleach and developer
- Aluminum foil, cut into strips (4-5 inches wide and long enough to cover the sections of hair you’re highlighting)
- Tinting brush
- Tail comb
- Gloves
- Hair clips for sectioning
Step 2: Prepare Your Workspace and Hair
- Workspace: Choose a well-lit, clean area where you can comfortably work with mirrors to see both the front and back of your head.
- Hair Preparation: Start with dry, detangled hair. Section your hair using the tail comb and clips, leaving out the part you’ll highlight first.
Step 3: Mixing the Highlighting Formula
Follow the instructions on your highlighting kit or mix your bleach and developer accordingly. Always wear gloves to protect your hands during this process.
Step 4: Application Technique
- Sectioning: Take a thin section of hair with the tail comb. The thinner the section, the more natural the result. Place a strip of foil under this section, ensuring it’s close to the roots without touching the scalp.
- Applying the Highlighter: Use the tinting brush to apply your highlighting mixture evenly from the roots to the ends (or mid-length to ends if you’re going for a balayage effect). Be careful to cover all strands in the section for an even highlight.
- Folding the Foil: Once the section is fully coated, fold the foil around the hair. You can fold the foil in half and then fold the edges to secure the hair inside, making sure the foil is snug but not too tight. This helps to keep the heat in and process the color evenly.
Step 5: Processing Time
Leave the foil in your hair for the recommended time based on your hair color and the desired level of lightness. Check a small section halfway through the processing time to gauge how the color is lifting.
Step 6: Rinsing and Conditioning
Once the processing time is up, carefully unfold the foils and rinse out the highlighting mixture with lukewarm water. Follow up with a nourishing conditioner or a toner if necessary, to achieve the perfect shade.
Tips for Success with Foil Highlights
- Practice Makes Perfect: If you’re new to this, practice the folding and application technique with water first.
- Sectioning Is Key: Good sectioning ensures an even distribution of highlights. Use the tail comb to create clean sections.
- Safety First: Always do a patch test before applying any chemical treatment to avoid allergic reactions.
Foil highlighting can transform your hair into a multi-dimensional masterpiece. With patience and practice, you can achieve salon-quality results at home.
How to Do Peek-a-Boo Highlights Hair
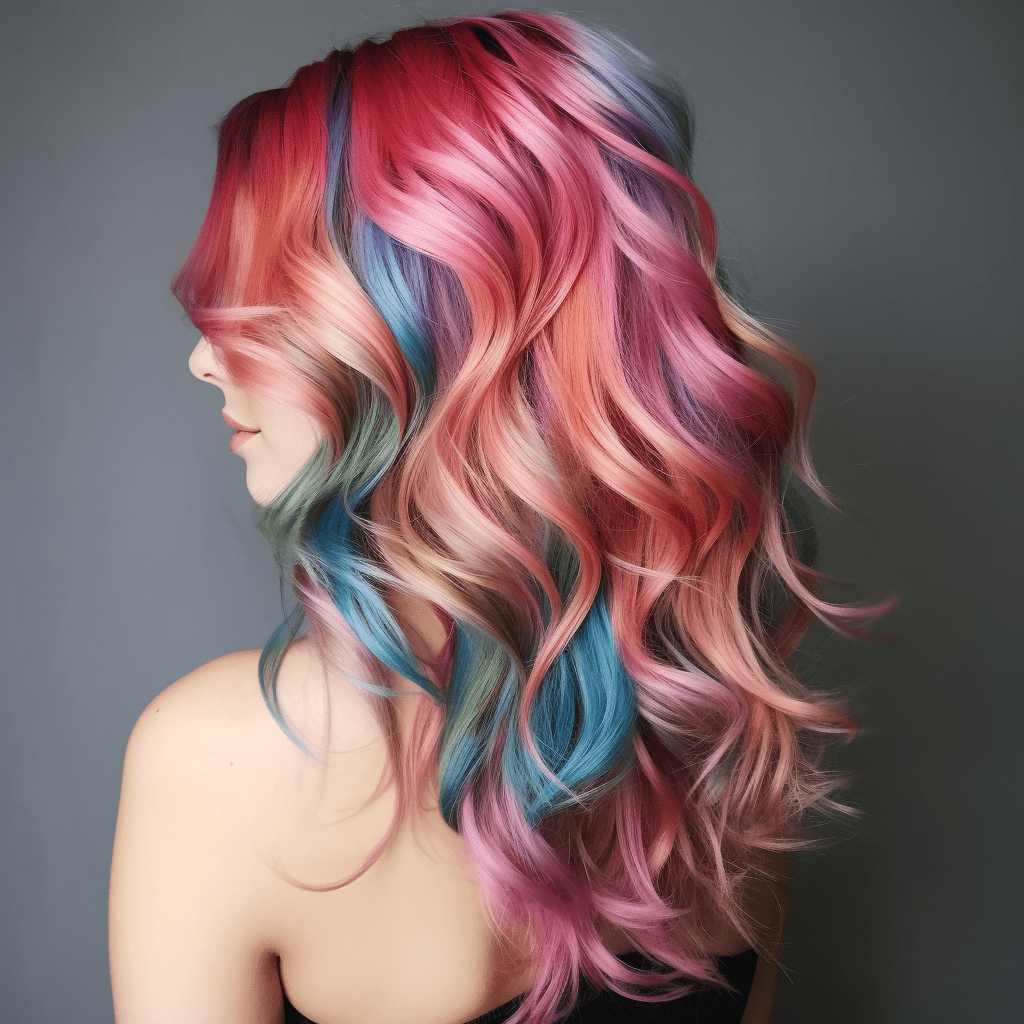
Peek-a-boo highlights are a fun and creative way to add a pop of color to your hair without committing to a full head of bright colors. These hidden gems of color peek out from under your top layer of hair, offering a subtle or bold flash of color when you move. Perfect for those who love a hint of mystery in their style, peek-a-boo highlights can be customized to fit any personality. Let’s break down how to achieve this playful look.
Step 1: Choose Your Color
First things first, decide on the color or colors you want to use for your peek-a-boo highlights. You can go as bold or as subtle as you like, from neon pinks to soft pastels. Consider your base hair color and how the chosen highlight colors will complement it.
Step 2: Section Your Hair
- Sectioning for Peek-a-Boo: Part your hair to find the lower layers that will serve as the canvas for your peek-a-boo highlights. The idea is to apply color to sections of hair that are typically covered by the top layer of your hair.
- Secure the Top Layer: Use clips to securely hold the top layer of your hair out of the way. This top layer will fall naturally over the highlighted sections, hiding them until you want them to peek through.
Step 3: Prepare Your Color
Mix your chosen hair color according to the instructions provided. Whether you’re using a semi-permanent dye for a temporary pop or a permanent dye for longer-lasting color, always follow the product guidelines to ensure the best results.
Step 4: Apply the Color
- Application: Take small sections of the hair you’ve separated for highlights and apply the color. Use a brush for precision and make sure the strands are well coated to achieve an even application.
- Timing is Key: Leave the dye in your hair for the amount of time recommended on the product packaging. This varies depending on the brand and the intensity of the color you want to achieve.
Step 5: Rinsing Out the Color
Once the processing time is up, rinse out the color with lukewarm water until it runs clear. Follow up with a color-safe conditioner to lock in moisture and protect your new highlights.
Step 6: Styling Your Peek-a-Boo Highlights
After your hair is dry, style it as you usually would. The peek-a-boo highlights will remain hidden under the top layer of your hair until you choose to reveal them. Try different hairstyles like updos, braids, or curls to showcase your new pops of color in various ways.
Tips for Perfect Peek-a-Boo Highlights
- Blend for Subtlety: For a more subtle look, choose colors close to your natural hair color. The highlights will blend more seamlessly, providing just a hint of color.
- Bold Contrasts: For a more dramatic effect, opt for high-contrast colors that stand out against your base hair color.
- Maintenance: Peek-a-boo highlights tend to be low maintenance since they grow out less noticeably than traditional highlights. However, consider using color-preserving products to keep your highlights vibrant.
Peek-a-boo highlights are a fantastic way to express your unique style without the full commitment of an all-over color.
How to Darken Highlighted Hair
Sometimes, after living with lighter highlights for a while, you might find yourself craving a return to a darker, richer hue. Whether it’s for a seasonal change, personal preference, or to give your hair a break from bleaching, darkening highlighted hair can refresh your look and add depth to your color. Let’s explore how to successfully transition from light to luscious dark tones.
Step 1: Choosing the Right Shade
- Find Your Match: Select a color that closely matches your natural hair color or the base color of your hair. If you’re unsure, consider consulting with a professional colorist to find the perfect shade.
- Semi-Permanent vs. Permanent: For a less drastic change or to experiment with darker shades, semi-permanent dyes are a great option as they gradually fade over time. For a more lasting change, choose a permanent dye.
Step 2: Preparing Your Hair
- Conditioning: Before applying any color, it’s essential to ensure your hair is in good condition, especially if it’s been previously lightened. Use a deep conditioning treatment a few days before dyeing to help strengthen and moisturize your hair.
Step 3: Color Application
- Strand Test: Always perform a strand test before applying the color all over. This step will help you gauge how the dye interacts with your highlights and the resulting color.
- Even Application: Apply the dye evenly across your hair, starting from the roots and working your way down to the ends. If your highlights are very light, they may absorb the color more quickly, so keep an eye on the color development.
Step 4: Processing Time
- Follow Instructions: Leave the dye in your hair for the amount of time specified on the product packaging. Processing time can vary depending on the dye used and the desired darkness.
Step 5: Rinsing and Aftercare
- Rinse Thoroughly: After the processing time is up, rinse your hair thoroughly with lukewarm water until the water runs clear. Then, apply a color-safe conditioner to help seal in the color and add moisture.
- Aftercare: To maintain your newly darkened hair and keep it looking vibrant, use color-protecting shampoos and conditioners. Avoid washing your hair too frequently, as this can cause the color to fade more quickly.
Tips for Darkening Highlighted Hair
- Gradual Transition: If you’re nervous about a dramatic change, consider darkening your highlights gradually over a few coloring sessions. This approach can help you adjust to the new color and prevent any shock from a sudden transformation.
- Professional Advice: If you’re unsure about the process or how a particular color will look on you, consulting with a professional hairstylist is always a wise choice. They can offer personalized advice based on your hair’s condition and your desired outcome.
- Maintain Hair Health: Coloring can stress your hair, so ensure you’re giving it plenty of TLC. Regular trims, deep conditioning treatments, and minimal heat styling can help keep your darkened hair looking healthy and shiny.

How to Get Rid of Highlights in Hair
There comes a time when you may decide that the highlighted look is no longer for you. Whether you’re craving a return to a more natural shade or simply wish to embark on a new hair adventure, there are several effective methods to wave goodbye to your highlights. Let’s walk through the steps to achieve a uniform hair color, smoothly transitioning away from highlighted locks.
Step 1: Evaluate Your Options
- Color Correction: This is a professional service offered in salons where a colorist adjusts the color of your hair to either return to your natural shade or transition to a new color entirely. It’s often the safest route to ensure desired results.
- Toning Down: Using a toner or a semi-permanent dye closer to your base color can help blend the highlights with your natural hair color, reducing their contrast.
- Going Darker: Similar to darkening highlighted hair, choosing a permanent or semi-permanent color that matches your roots can cover highlights effectively.
Step 2: Preparing Your Hair
- Healthy Foundation: Ensure your hair is in good condition before attempting to cover up highlights. A week before your color change, use deep conditioning treatments to strengthen your hair.
- Patch Test: Always do a patch test with the color or toner you plan to use. This step is crucial to avoid unexpected allergic reactions and to preview the color result.
Step 3: Choose the Right Color
- Natural Match: Pick a shade that closely resembles your natural hair color for the most seamless transition. If you’re unsure, a professional hairstylist can provide guidance.
- Quality Products: Opt for high-quality hair dyes or toners that are less likely to damage your hair or fade quickly.
Step 4: Application
- Even Coverage: Apply the color thoroughly to ensure all highlighted areas are covered. Using a brush can help achieve an even application, making sure every strand is coated.
- Follow Instructions: Adhere strictly to the timing instructions on the dye package to avoid over-processing, which can lead to damage or an undesirable color.
Step 5: Aftercare
- Gentle Washing: Use a sulfate-free shampoo and conditioner designed for color-treated hair to maintain the new color and keep your hair healthy.
- Moisturize: Continue with regular deep conditioning treatments to restore moisture and shine to your hair.
- Limit Heat Styling: To prevent further damage and color fading, minimize the use of heat styling tools.
Tips for Getting Rid of Highlights
- Patience is Key: If your goal is to return to your natural color and you prefer not to dye your hair, consider allowing the highlights to grow out naturally. Regular trims can gradually remove the highlighted ends over time.
- Professional Assistance: For those who are hesitant to tackle this process alone or have complex coloring needs, seeking the help of a professional colorist is highly recommended. They can offer solutions tailored to your hair’s condition and your desired outcome.
- Embrace the Transition: Changing your hair color can be a significant adjustment. Be open to the process, and remember that hair color is not permanent. There’s always room to adjust and find what works best for you.